Blog
Install Intercom System: Complete How-To Guide
By
Nelson Uzenabor

You're standing at a front door with half the kit on the table, one screw stripped, and a nagging feeling that the system you bought may not fit the building at all. That's the point where the friction sets in when they try to install intercom system hardware, because the decision happens before the first hole is drilled. Get the layout, wiring path, and device type right, and the rest is straightforward. Get them wrong, and you spend the afternoon chasing noise, weak signal, and a door station that looks mounted but never really works.
Table of Contents
Before You Unbox Anything
I've seen homeowners open a shiny video kit, walk it to the front porch, and then realize the house has three entry points, a finished plaster hallway, and no obvious route from the panel to the upstairs landing. At that point, the project stops being about the intercom itself. It becomes about the building.
The first check is simple, count every place the system has to serve. A single front door is one thing, but side gates, garage entries, rear doors, and interior stations change the design fast. The next check is purpose, because a system meant for convenience isn't the same as one meant for visitor screening or access control. If you're trying to let family in more easily, a basic audio setup may be enough. If you need to identify visitors before opening a door, video and remote release become part of the decision.
That choice is also where cost starts moving. Independent consumer and contractor guides put a typical U.S. install at about $1,500 to $3,000 for a basic setup, with a broader normal range of $1,200 to $8,500, and advanced systems reaching $15,000 or more depending on the configuration installation cost guide. The spread is driven by structure, not just hardware. Finished walls, extra stations, smart-home integration, and more entry points all push the job toward the high end.
A quick walk-around with a notebook saves time later. If the building has finished walls, hidden fire blocks, or awkward access above ceilings, write that down before you buy anything. If you want a broader way to compare formats before choosing, the compare intercom system types resource is useful because it frames the choice around building layout, not product hype. For teams thinking about service workflows as well as entry hardware, the same planning mindset shows up in this customer support strategy article, where the right system is the one matched to real use, not the one with the most features.
Choosing the Right System Type for Your Building
System Type | Best For | Typical Install Time | Main Trade-off |
|---|---|---|---|
Audio-only | Simple entry control, smaller homes, basic communication | Shorter | Less screening ability |
Video intercom | Visitor identification and better screening | Moderate | More wiring, power, and setup |
Wired system | New builds, open framing, stable signal needs | Moderate to longer | More labor on finished walls |
Wireless system | Retrofit jobs where cable fishing is difficult | Often shorter upfront | More dependence on signal quality |
IP-based system | Smart homes, remote access, networked properties | Moderate | Requires network setup and hardening |
The table makes the point. The best system is the one that fits the walls, the number of entry points, and the level of control you need. Everything else is marketing noise.
Wired Versus Wireless and What Actually Fits Your Building
People ask for a simple answer here, but the building usually decides for them. A wired system is hard to beat when you have open framing, easy attic access, or multiple stations that need consistent behavior. A wireless system can save a lot of labor when the walls are finished and you don't want to fish cable through old cavities.
Practical rule: if cable routing is straightforward, wired usually gives you the cleaner long-term result. If cable routing is the real obstacle, wireless can be the smarter compromise.
A 1920s apartment with plaster walls is a different job from a new-build with open studs. In the older place, the challenge is usually hidden structure, not the station itself. The labor you avoid by going wireless may be worth more than the theoretical simplicity of a wired layout, especially when the alternative is opening finished surfaces and patching after the fact. In the new-build, wired is often the better bet because the path exists before the drywall goes up.
Wireless isn't automatically easier once the device is on the wall. For IP stations, the network still has to be stable enough to carry audio and video cleanly, and one installation guide advises verifying at least -65 dBm Wi‑Fi strength at the door station before relying on wireless connectivity IP intercom install guide. If the signal is weak, the install usually becomes a troubleshooting job instead of a finish job.
For a small office with one glass door, wireless can be reasonable if the device only has to serve one obvious entry and the network is already solid. But if the same office needs a door release tied to a gate controller, the system becomes more sensitive to delays and misconfiguration. That's where full-stack network installation tips help, because the network side matters just as much as the mounting side in modern installs. The closer your project gets to a shared office or mixed-use building, the more it starts to resemble the planning needed in this telephone and intercom systems overview, where device choice and infrastructure have to line up.
Running a Proper Site Survey
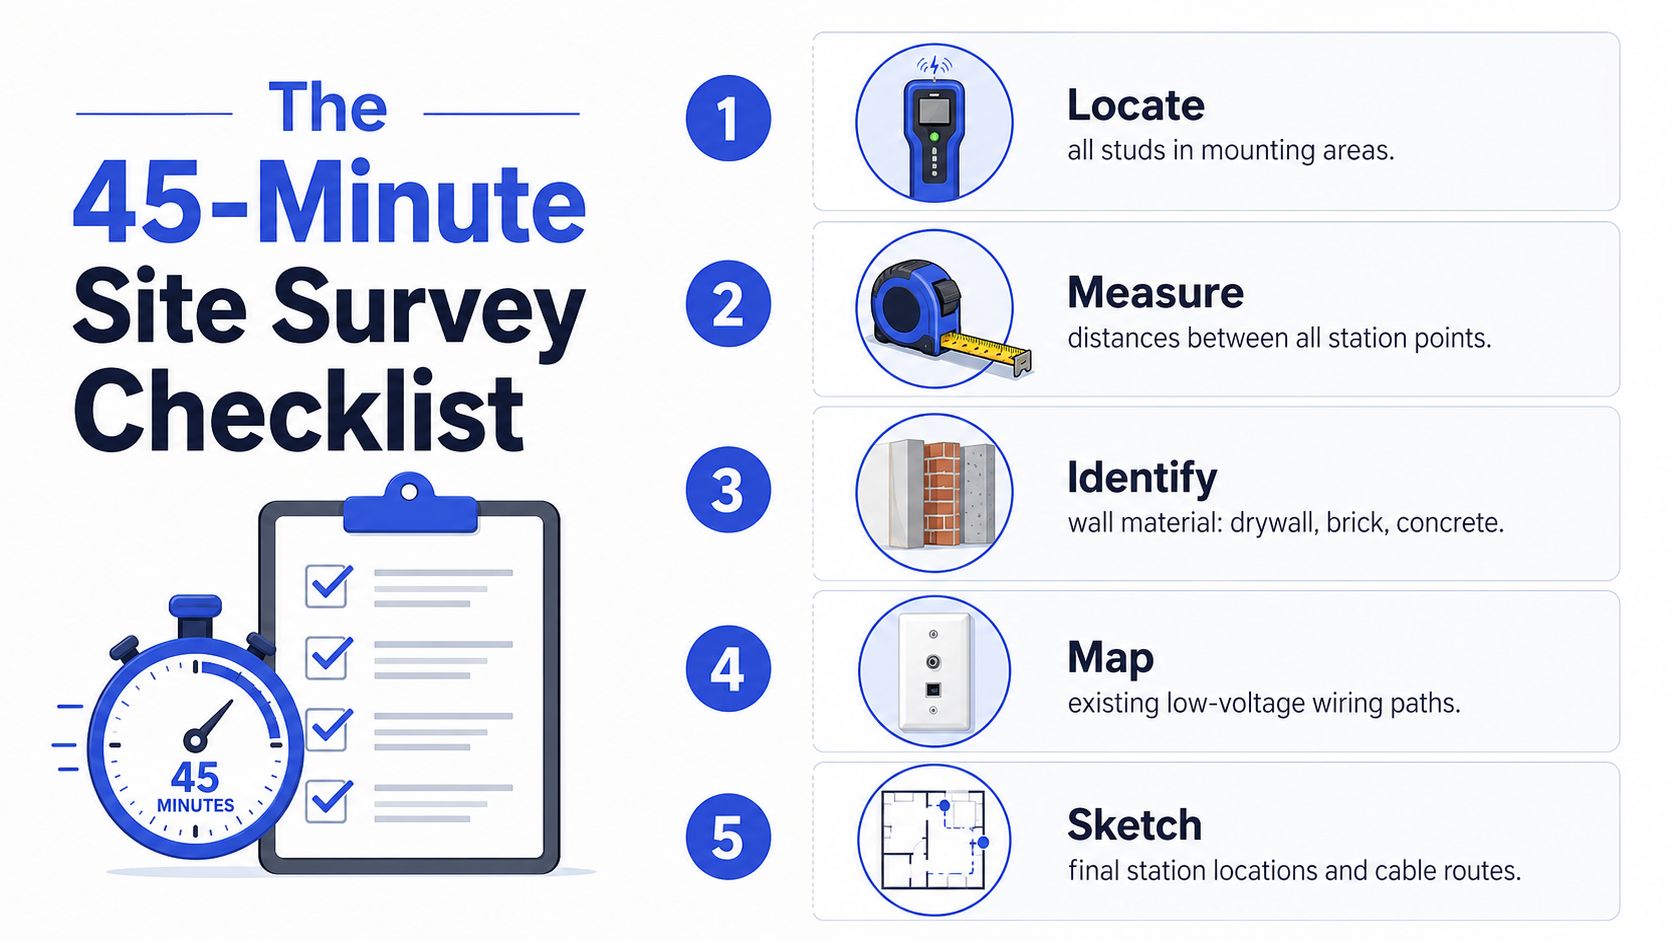
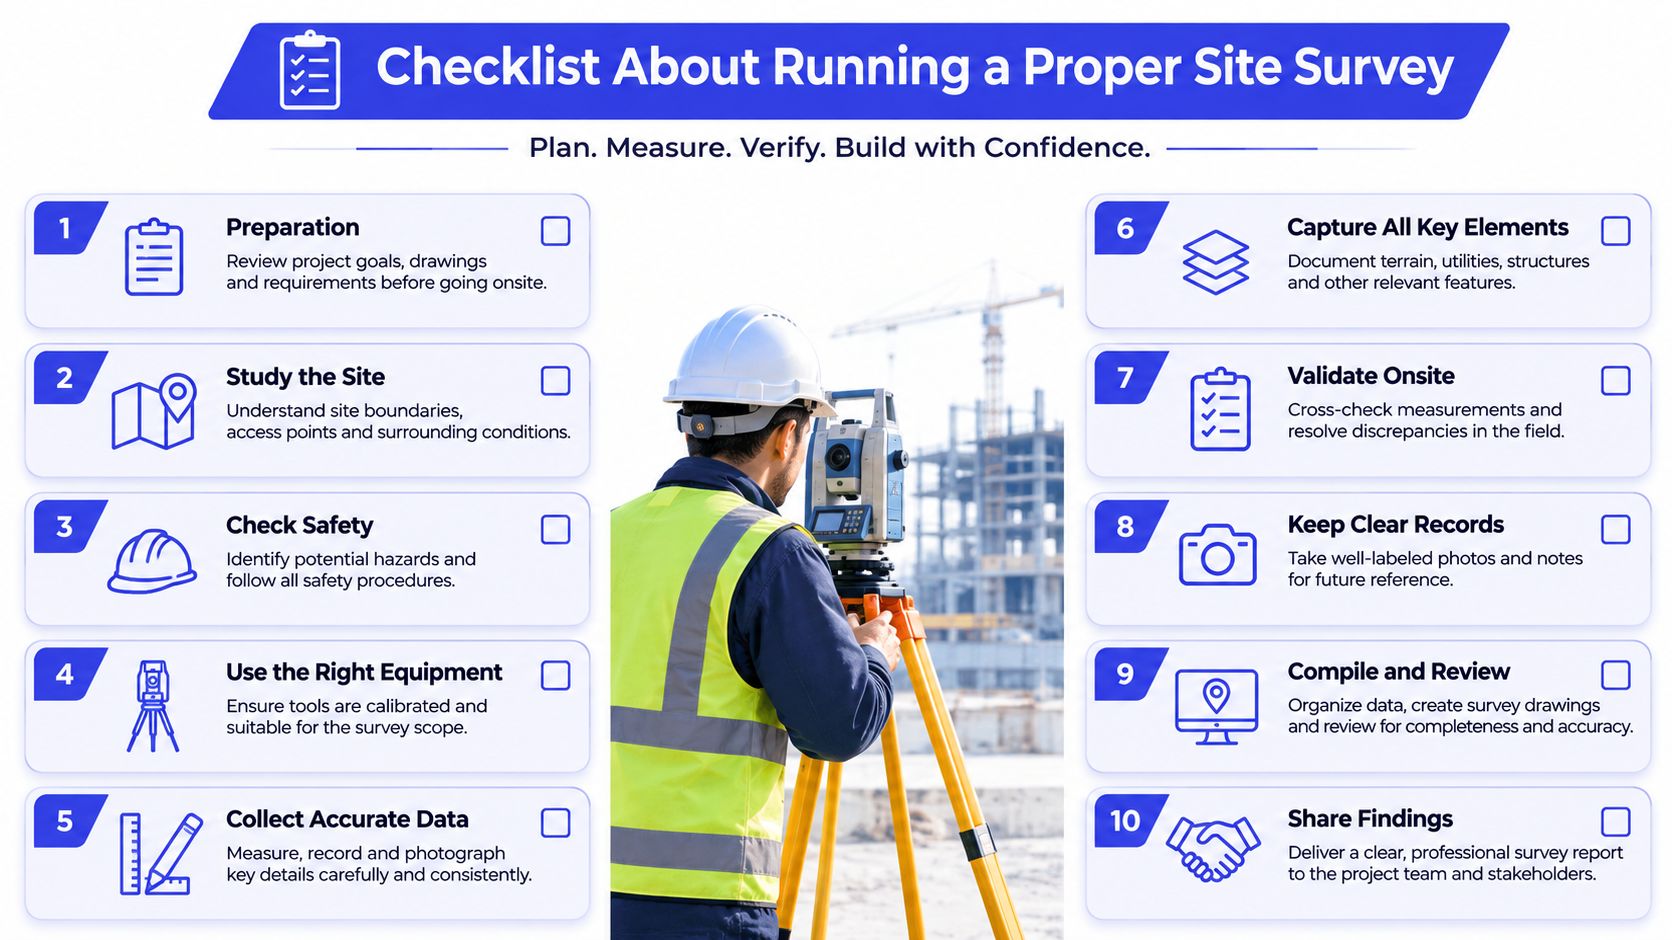
A proper survey takes less time than fixing a bad install, and it prevents the kind of mistakes that make a simple job drag into a weekend. I treat it like a 45-minute routine with a hard stop. If the layout is stranger than expected, the survey tells you before any drilling starts.
What to Check First
Start with the walls. Use a stud finder, because guessing at stud locations is how you end up with a crooked station or a mount that refuses to hold. Then confirm the wall material, since drywall, brick, and concrete all change the fasteners, the bit selection, and the time required.
Next, map the power and cable path. One professional guide recommends running a dedicated cable from the transformer to the master station with 300 mm service loops, then branching to sub-stations in a star topology home installation guide. That little loop matters because it gives you slack for termination and later service without stressing the conductors. It's also the easiest way to avoid a station hanging from a wire because the final cut was too short.
A survey should answer one question clearly, can the cable move through the building without damaging the building?
Where Retrofit Jobs Go Wrong
Older buildings are the ones that punish assumptions. Installation guides often show clean cavities and easy access, but real retrofit work can mean attic runs, basement access, crawl-space work, fish tape, and tight stud bays older building retrofit challenges. If you can't see a path from source to station, don't pretend one exists.
The survey is also where you catch the things that don't show up in a product brochure. Finished plaster ceilings can block easy routing. Fire blocks can stop a cable run halfway through a wall. If the panel needs to be near a transformer or a door release device, you need to know that before the kit is mounted, not after.
The best survey notes are ugly and specific. Measure the distance between every point. Mark every obstacle. Sketch the final station locations and note the cleanest cable route. That's the difference between a clean installation and a day spent opening walls you didn't mean to touch.
Tools, Materials, and Safety Prep
A lot of bad installs start with a missing tool, not a bad design. The installer reaches for the wrong bit, the cable jacket gets nicked, or the mount goes in with hardware that was never meant for the wall type. That's how a low-voltage project turns into a repair call.
The core kit is straightforward. You need fish tape, the correct low-voltage cable, a real stud finder, a non-contact voltage tester, a multimeter, drill bits that match the boxes and anchors, and the transformer specified for the system. If the station is outdoors, add weather-resistant hardware and sealant that matches the surface. If the job includes an electric strike or magnetic lock, confirm those parts before you start cutting cable, not after.
Safety starts with the breaker. Shut off the correct circuit, not the one that seems close, then verify it with a tester before touching any conductors. That matters because intercom work often crosses from low-voltage control into line-voltage feed points at the transformer. The wrong assumption there can burn a device, trip the system, or injure the person doing the work.
Don't trust the wall label alone. Verify the circuit dead, then verify it again at the conductors.
A workbench helps more than people expect, because it keeps the station, labels, screws, and terminations organized before the wall goes live.

If you're choosing a transformer and planning the feed near the panel, a Lighthouse Energy Services wiring diagram can be useful context for understanding how the house wiring is laid out before you add another low-voltage branch. That's especially helpful when the intercom shares space with other circuits in a crowded utility area.
The main judgment call is simple. If the tools you need are common household tools plus a tester and a multimeter, the project is probably in DIY range. If the build already requires opening walls, chasing hidden wiring, or coordinating with a lock controller, hand it off before the wall gets scarred.
Wiring, Mounting, and Physical Installation
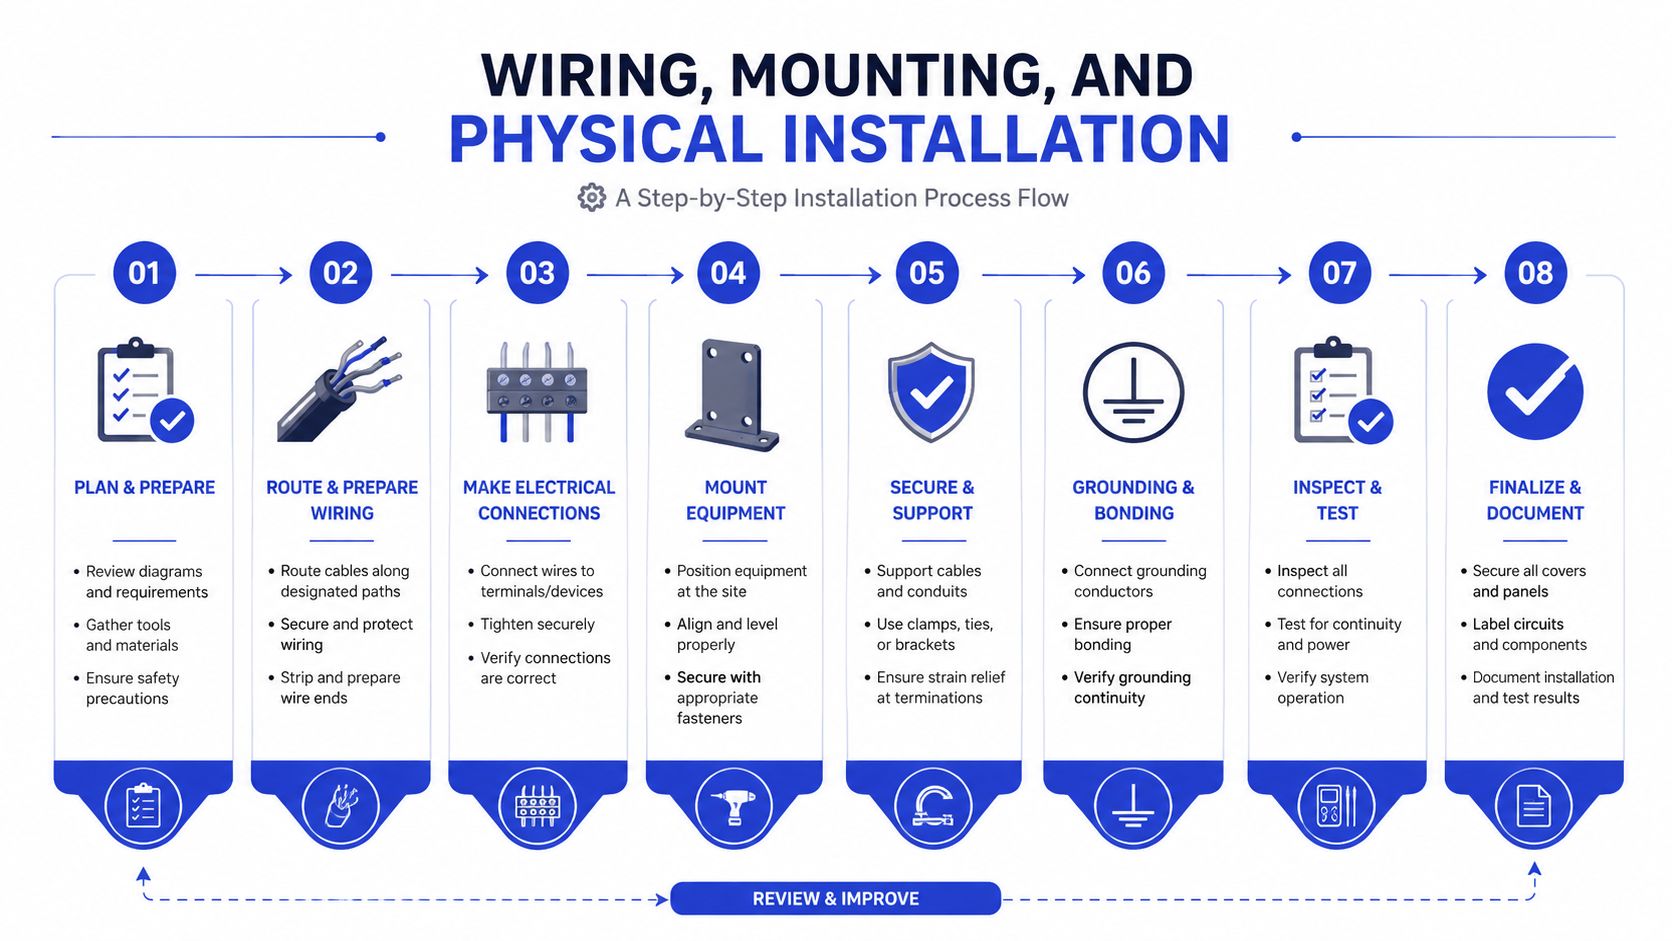
The physical install works best when you follow the path the cable wants to take, not the path that looks shortest on paper. I start by killing power, then I mount the transformer near the electrical panel or another approved location where the feed is clean and serviceable. After that, I run dedicated cable from the transformer to the master station and then out to any sub-stations in a star pattern, because it keeps troubleshooting sane later.
The Cable Path Matters More Than the Box
Good work gets separated from messy work here. Leave the service loops at each station, keep the cable off sharp edges, and avoid running parallel to 110V lines for long stretches if you can help it. One of the fastest ways to create hum or intermittent noise is to staple low-voltage cable too tight through insulation or squeeze it against a power run.
Exterior stations need extra care. Mount the unit at a height that makes sense for the user, then seal the penetration so water doesn't ride the cable into the wall cavity. If the station is exposed to weather, strain relief matters as much as the gasket. A loose cable behind a door station can slowly ruin an otherwise clean install.
Physical Mounting and Clean Termination
Use the right back box or mounting plate for the wall material, then set the station square before tightening anything fully. Terminate the conductors neatly, because a tidy termination is easier to test and easier to service months later. If the building has multiple stations, label every run as you go. It takes seconds now and saves confusion later when one room loses call audio.
A clean mount is not cosmetic. It usually tells you the cable path was planned correctly.
For the actual configuration sequence on modern kits, I treat physical setup and network setup as two parallel jobs. The physical side handles stations, chimes, and door release hardware. The network side handles PoE, app pairing, and whether the system can stay stable after it leaves the bench.
Before closing the walls or tightening trim, check the routing one more time. If the cable crosses a sharp corner, protect it. If the entry point is exposed, weatherproof it. If the system is going to feed a strike or a gate controller, test the release before the final cleanup. A rushed finish is the easiest way to turn a working system into a callback.
Configuring Audio, Video, Door Release, and Network Settings
Most IP intercom problems stem from setup errors. The unit powers on, the app sees it once, and then the installer starts chasing a trail of small misses, wrong subnet placement, default credentials left in place, or a call path that never got paired correctly.
Start with how the station behaves on site. Set the audio levels so the station does not clip or hiss, choose a chime pattern that fits the space, and adjust the video angle and night mode so the camera captures faces instead of reflections. On older buildings, that often means working around odd entry geometry, deep reveals, or a retrofit box that leaves the lens pointed too high or too low. If the system controls an electric strike or magnetic lock, test the release under load, not just on the bench. A relay that clicks cleanly on the table can still fail once it meets a real door hardware stack.
The network side is where modern installs stop being just wiring jobs. Power over Ethernet, static IP planning or DHCP reservations, subnet placement, default-login changes, and app pairing all matter because the intercom is now a networked device, not a dumb speaker. One step-by-step IP intercom guide treats default credentials, subnet assignment, bitrate, and login changes as part of the install process, not optional extras. That is the right mindset. Skip those items and you may finish the mount while leaving the system exposed or unreliable.
The five most common failures are easy to diagnose if you stay disciplined. No power usually means the feed, PoE source, or transformer path was never confirmed end to end. Hum on the line often points back to routing or grounding issues. Dropped calls usually mean the network side is weak or the station cannot hold a clean connection. Door release not firing is usually a wiring, relay, or compatibility issue. App won't pair often comes down to credentials, network placement, or a missed setup step.
Changing the admin password is required. Default login details are the easiest place for a modern install to fail on the security side, especially when the device connects to a mobile app or a larger building network. If the intercom needs to work with a smart-home hub or another platform, keep the integration narrow, test it locally first, and do not expose more of the system than the job requires. For teams that already work with connected systems, the same discipline shows up in this customer data integration article, where correct setup keeps different parts of the system aligned instead of drifting apart.
Testing, Troubleshooting, and Ongoing Maintenance
A system that powers on is not a system that works. I test the call from each sub-station, listen for clear two-way audio, trigger the door release, confirm the video feed in the app, and check that every receiver chimes the way it should. If one station behaves differently, I don't assume it's fine. I trace it.
The five recurring problems usually point to a narrow cause. No power at the station means the feed path is broken. Audible hum usually means poor routing or interference. Dropped calls point to network instability. Door release not firing means the output path, lock hardware, or relay setup needs attention. The app refusing to pair usually means the device was never set up cleanly in the first place.
If the system fails twice in the same place, stop blaming the symptom and inspect the path.
Maintenance is simple but easy to skip. Check firmware when the vendor provides it, inspect outdoor seals seasonally, and clean the camera lens before image quality starts drifting. If the install required attic runs, crawl-space work, or hidden wall fishing, keep a note of where those paths went. That makes future service faster, and it keeps a small issue from becoming a wall-opening event.
The clear line into pro territory is this. If the project starts needing structural access, lock integration beyond a simple release, or network hardening you don't fully understand, the job has outgrown casual DIY. At that point, a clean handoff is cheaper than repairing a half-finished install.
If you're planning an intercom job for a home, office, or multi-entry property, Chatgrow can help you build a support experience around the same kind of practical detail work covered here. Visit Chatgrow to see how it handles customer questions, lead qualification, and on-brand responses around the clock.
Related Posts
Continue Reading
More articles from the ChatGrow Team.